How to Add a User in Google Analytics 4
Learn how to add a user in Google Analytics 4.
In the digital age, data is the cornerstone of informed decision-making and strategic planning. For businesses and website owners, understanding user behavior is paramount to optimizing online experiences and achieving online goals.
Enter Google Analytics 4 (GA4), the cutting-edge iteration of Google’s analytics platform designed to provide deep insights into user interactions across multiple digital platforms. With its revamped interface and advanced tracking capabilities, GA4 offers a wealth of opportunities to uncover meaningful insights.
However, to tap into its potential, you first need to understand the basics, including how to add users to your GA4 property. Whether you’re an entrepreneur, marketer, or website administrator, this guide will walk you through the process of seamlessly adding users to your GA4 account, empowering you to harness the power of data-driven decision-making like never before.
Why would you need to add a user in Google Analytics?
Adding a user in Google Analytics 4 is essential for collaborative management and analysis of your website’s data. It allows you to:
- Delegate Responsibilities: Assign different roles to team members, such as analysts or marketers, to access relevant data and insights.
- Share Insights: Collaborators can access and interpret data, facilitating better decision-making and strategy development.
- Enhance Security: Assign appropriate permissions to maintain data security while enabling others to contribute effectively.
- Streamline Workflow: Distribute tasks and streamline workflows by allowing different team members to access specific data and reports.
- Optimize Performance: With shared insights, you can collectively identify trends, opportunities, and areas for improvement.
- Training and Learning: Grant limited access to team members for training purposes without compromising sensitive data.
- Monitor and Control: Maintain control over who accesses data and what they can do, ensuring data accuracy and compliance.
- Client Collaboration: Share specific reports with clients, fostering transparent communication and building trust.
- Audit Trails: Track changes made by different users for accountability and auditing purposes.
- Customization: Different users can create their custom reports and dashboards based on their specific needs.
Adding users to Google Analytics 4 promotes efficient collaboration, informed decision-making, and optimized website performance.
How to Add a User in Google Analytics 4
If you’re looking to add a user to Google Analytics 4 (GA4) involves granting access to a specific Google account, allowing them to view and analyze data within your GA4 property. To add a user to Google Analytics 4, follow these steps:
Step 1: Access Google Analytics
1. Go to the Google Analytics website: https://analytics.google.com/
2. Sign in with the Google account that has administrative access to the GA4 property.
Step 2: Select the GA4 Property
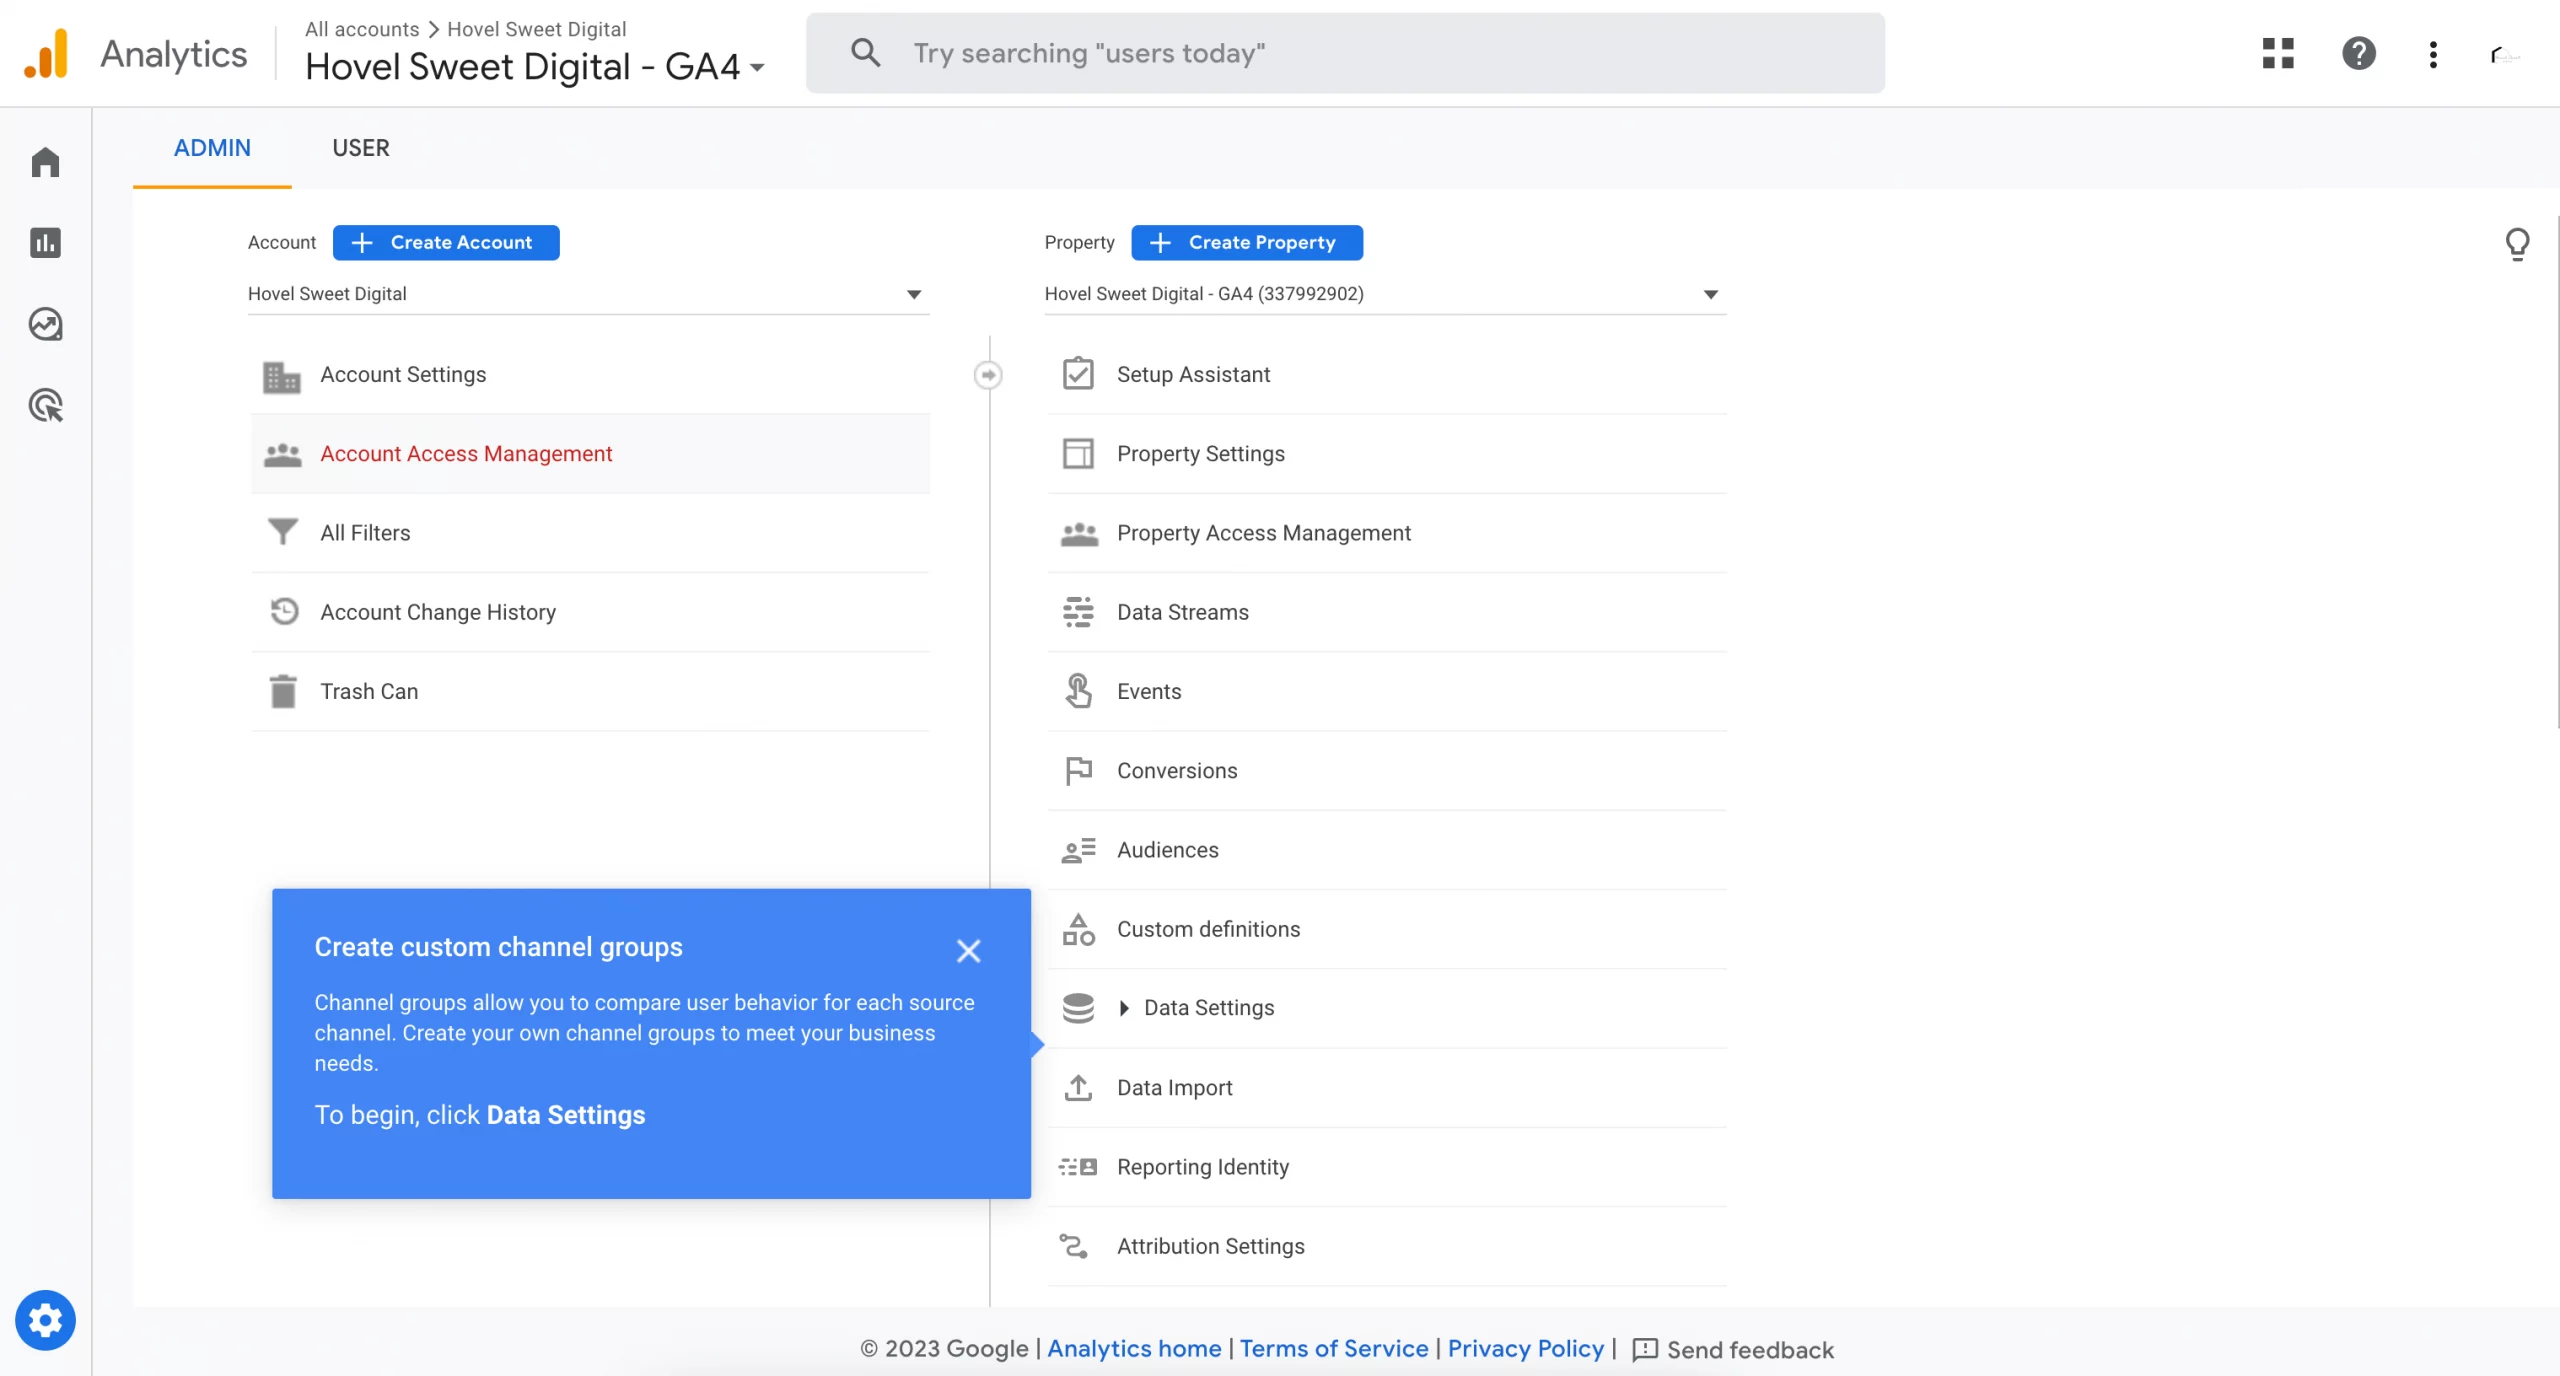
1. If you have multiple GA4 properties, click on the “Admin” option at the bottom-left corner of the page.
2. In the “Property” column, click on the drop-down menu and select the GA4 property to which you want to add a user.
Step 3: Add a User
1. In the “Account” column, click on “Account Access Management”.

Step 4: Invite New User
1. Click on the “+”, which stands for “Add New User” to invite a new user.
2. A new “Add permissions” window will appear.
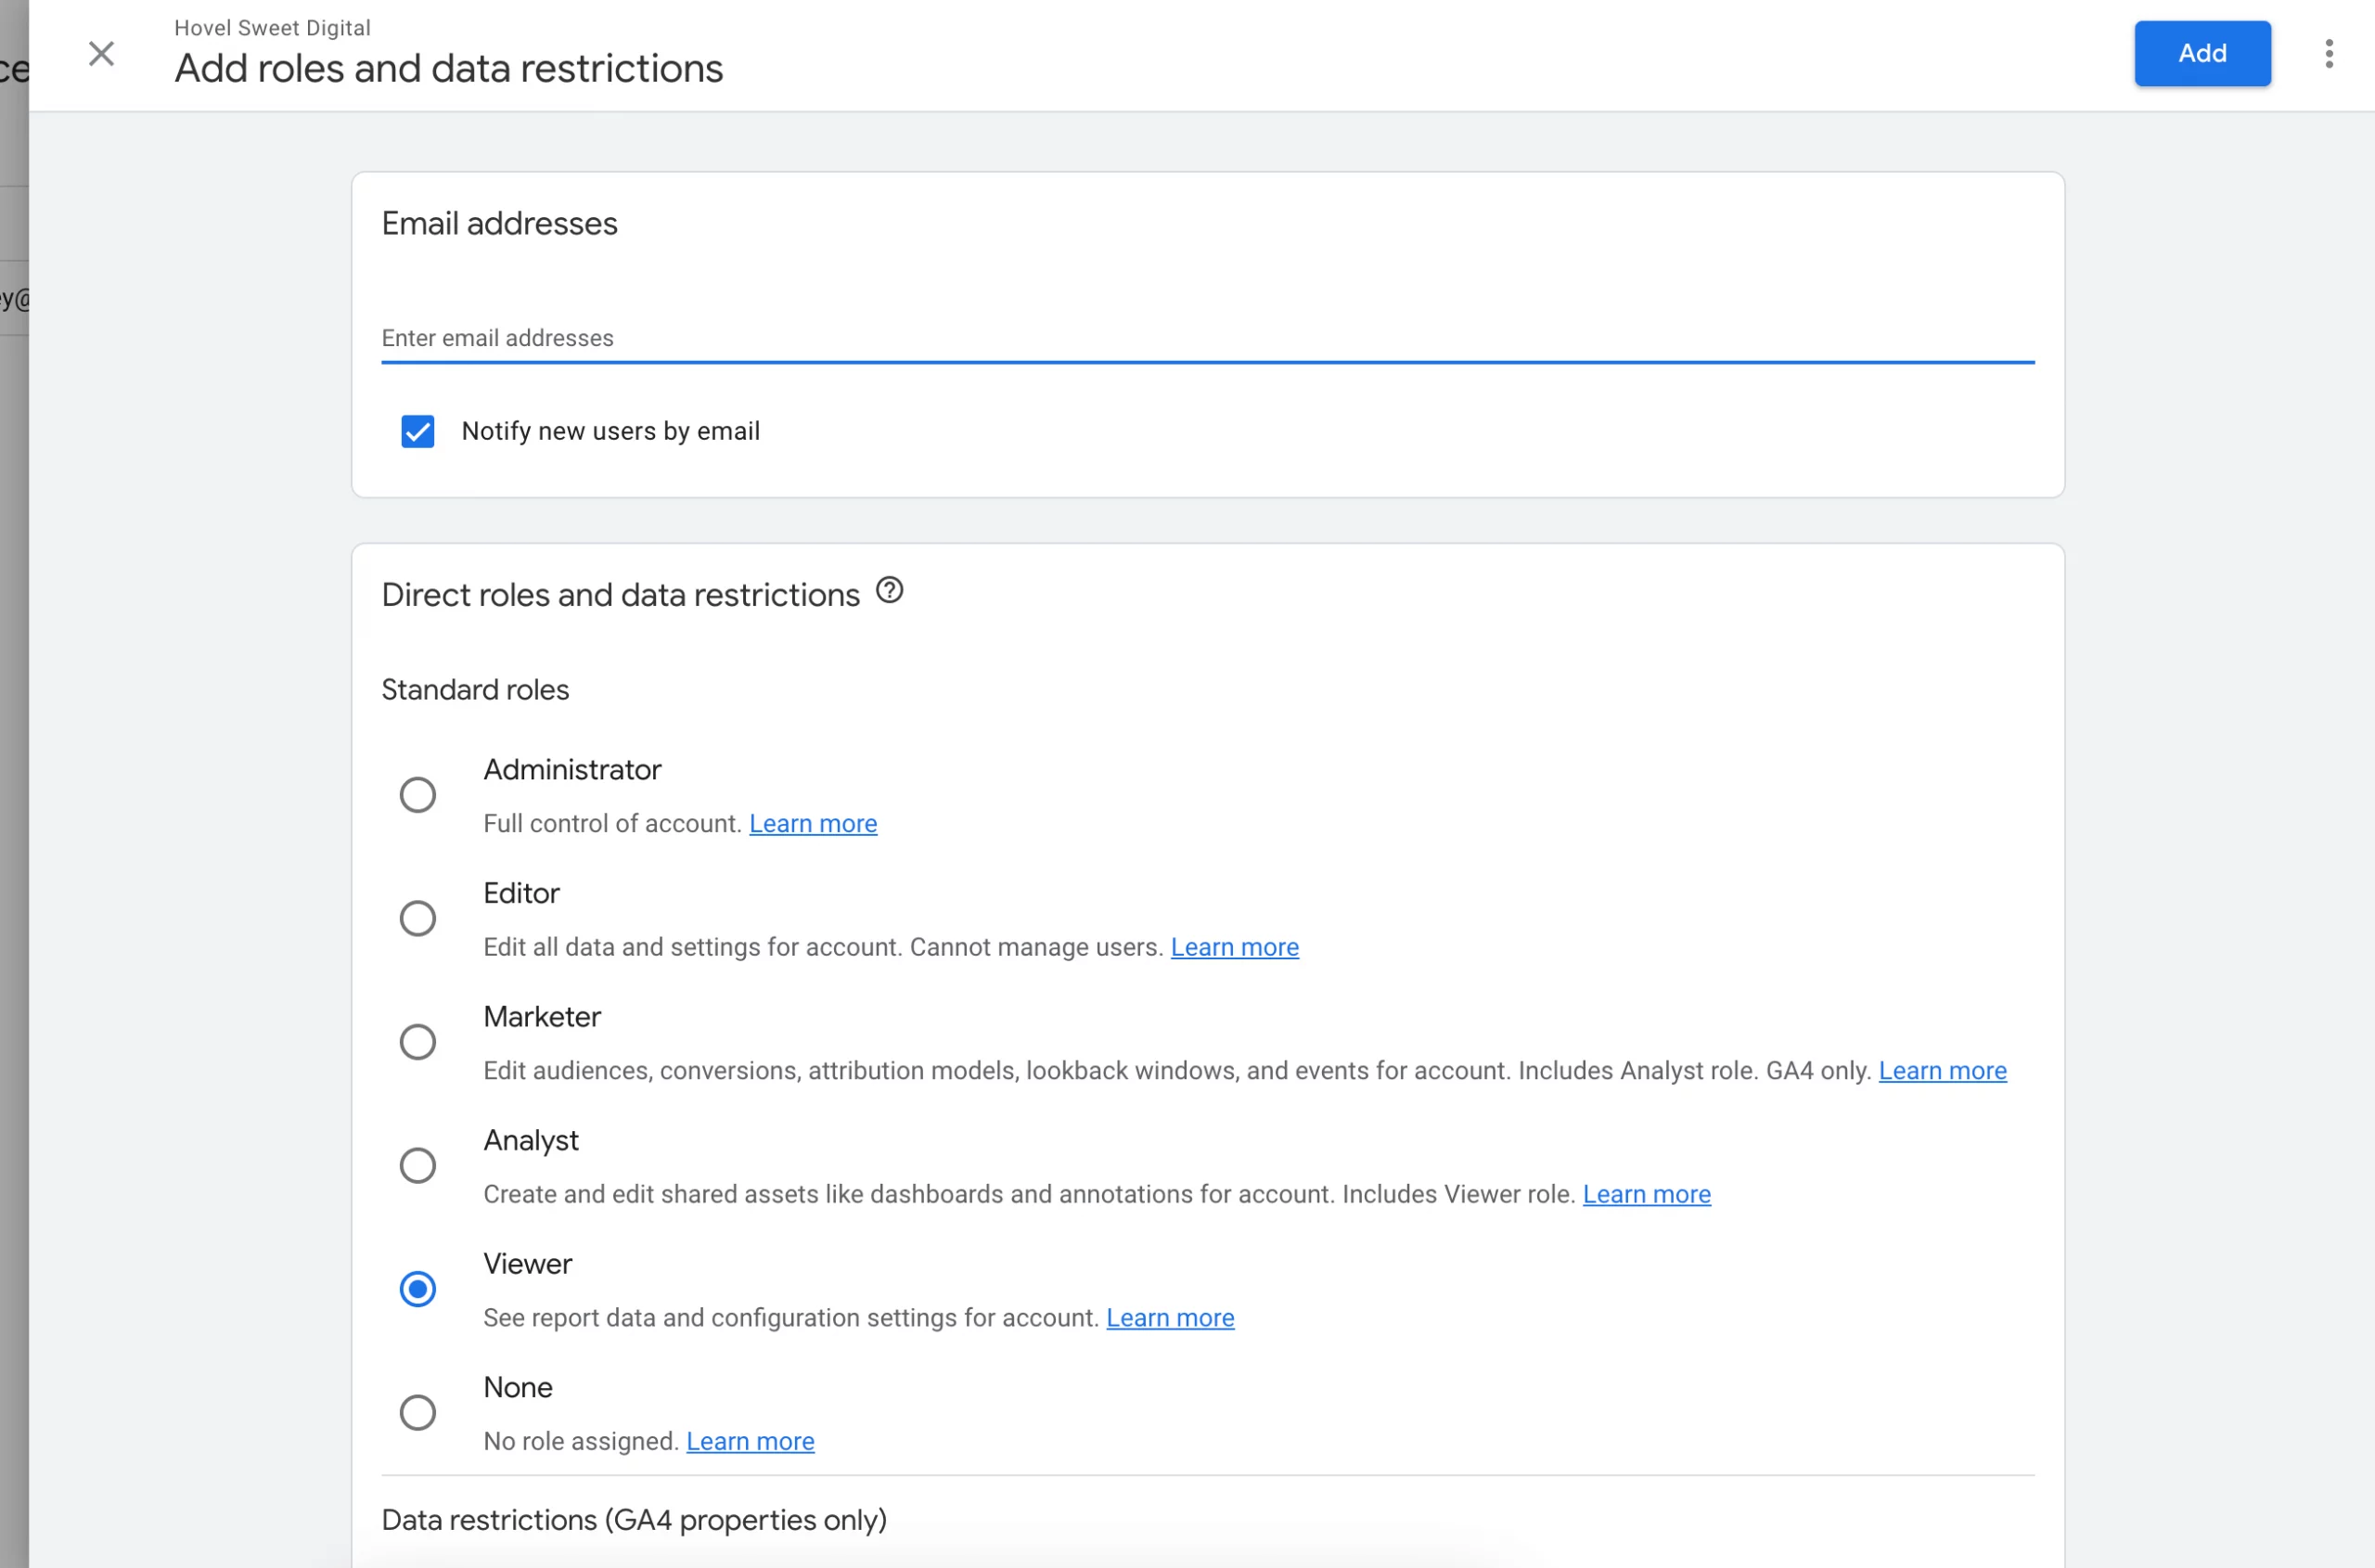
Step 5: Enter User Details
1. Enter the email address of the person you want to add as a user. Make sure you enter the correct email associated with their Google account.
2. Choose the desired permissions level for the user:
- Edit: Users with edit access can make changes to the GA4 property, such as creating and managing goals, filters, and segments.
- Collaborate: Users with collaborate access can view reports and collaborate with others but cannot make changes.
- Read & Analyze: Users with read & analyze access can view reports but cannot make changes or collaborate.
3. Optionally, you can notify the user via email by checking the box next to “Notify this user by email.”
4. Click on the “Add” button to send the invitation.
Step 6: User Confirmation
1. The user you invited will receive an email invitation to access the GA4 property.
2. Once they accept the invitation, they will gain access to the property according to the permission level you assigned.
Important Notes:
– Be cautious when granting edit access to users, as they will have the ability to make significant changes to your GA4 property.
– Always ensure that you are inviting the correct email address associated with the user’s Google account to prevent any issues with access.
That’s it! You have successfully added a user to your Google Analytics 4 property, and they can now access the reports and data based on the permissions you assigned.
Cheers,
Katie
Read Next: Google Analytics 4 for Beginners [TUTORIAL]
Liked this Post? Pin it for later!